Have you been a victim of the “413 Request Entity Too Large” error while working on uploading or creating content on your WordPress website? Do you think it is the WordPress Customization service provider to be blamed? No, they are not to be blamed. Specific themes, formats, plugins have a maximum file upload size that if crossed, brings about this error. 80 per cent of web hosting providers have configured their overall webpage specifics such that no user faces a problem with respect to file sizes. But occasionally, customized themes and plugins can prove to be unaccounted for by the web hosting providers and the error can arise.
Fortunately, there are several methods that can be used to fix this issue. Keep in mind that these methods involve dealing with critical WordPress files, so one must back up these files and also be careful while attempting to alter pre-set configurations. Keep reading to learn about four of these methods –
Method 1 – Increasing the file upload size limit via accessing the Functions file
Go to your WordPress dashboard and head to the Themes folder. You will find a file known as the functions.php file WordPress Customization service. This document consists of all code to define “objects” and “classes” for structuring and defining the functionality of your WordPress website. These files let you add new features that can tweak thumbnails, alter formats and design navigation drop-down menus.
Either add code to the functions.php file via the site-specific plugins or via Hostinger’s control panel. Follow this path – file manager 🡪 files 🡪 public_html folder 🡪 wp-content folder. Once the contents of the wp-content folder are visible, you can double click on the themes folder to find the correct functions.php file. Add the below-written code to your functions.php file. This code snippet increases the maximum upload and posts size to 256 MB while also letting you specify how much time will it be uploaded.
Line 1 – @ini_set( ‘upload_max_size’ , ‘256M’ ):
Line 2 – @ini_set( ‘post_max_size’ , ‘256M’ ) ;
Line 3 – @ini_set( ‘max_execution_time’ , ‘300’ ) ;
Go back to your post creation page and see if the 413 error yet persists or not.
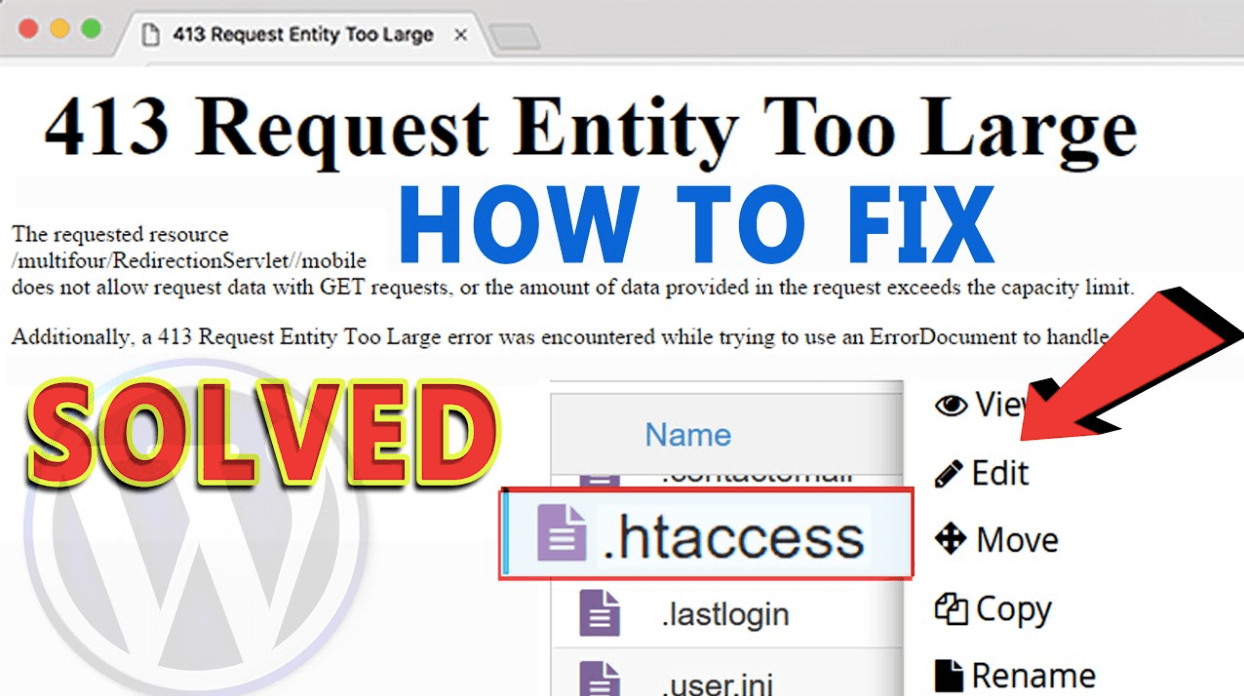
Method 2 – Increasing the file upload size limit via accessing the .htaccess file
This is another important file and all modifications to the code must be made with precaution. This file is created especially for communication with the local/live server. By getting access to this file you can change configuration settings. You can add/remove users, restrict users from specific features on the website, do caching and even optimize your systems.
To access this file you need to follow the following path Hostinger CPanel 🡪 file manager 🡪 files 🡪 public_html folder and now under the large list of files double click on the .htaccess file. Right at the end of the current WordPress code, you can paste the following code –
Line 1 – php_value upload_max_filesize 256M
Line 2 – php_value post_max_size 256M
Line 3 – php_value max_execution_time 600
Line 4 – php_value max_input_time 600
This code snippet gives the same results as in method 1 but is a slightly riskier file to play with if human error is considered. Do you yet think you need to hire WordPress developers to help you out?
Method 3 – Manually uploading the file via logging in to FTP client
Situations also arise when a designer is trying to upload a single, rather than several files at once. If the 413 Request Entity pops up only for that one file time and again, then a sensible option would be to upload the file via the manual FTP route.
Method 4 – Modifying Nginx Configuration
Being a part of Hostinger’s VPS server allows a user to modify the WordPress server environment as they need to. The web server has been instructed to restrict large-sized files; this is when the “413 Request Entity Too Large” error arises. But Nginx’s built-in systems allow a designer to alter the maximum size of a file that can be transferred to the server from another source. Changing this code would require access to a Visual Text Editor.
Start by opening your VPA via “ssh” and insert the following code snippet to begin editing your Nginx configurations.
Line 1 – Vi /etc/Nginx/nginx.conf
Now you can add code to this Nginx.conf file to increase the size maximum size of files allowed to be uploaded WordPress Customization service. Up next, save and close the file. If you want to test your work then use the following code –
Line 2 – # Nginx -s reload
Everything said and done, although the issue may seem to utterly frustrate a user and seek the help of WordPress customization services, if any of the above methods are followed with precision then you can save up on valuable money, time and refrain from sharing your creative thoughts and ideas via the backend of your website.